
20 Dollar Tree Decor Hacks That Look Like Pottery Barn (Most Cost Under $5)
Published: November 1, 2026
The first time I walked out of Dollar Tree with a cart full of glass cylinders and a bag of baking soda, my husband asked if I was planning a science fair. Three weekends later, a guest picked up one of those vases on my console table, turned it over looking for a price sticker, and asked where I had bought it. I said “Dollar Tree” and she did not believe me until I showed her the receipt.
That is the whole appeal of Dollar Tree decor hacks. The store itself is not the secret. Most of what is on the shelves looks exactly like what it is: shiny, light, and slightly too bright. The secret is what you do to it afterward, which usually means paint, texture, a better color palette and a lot of restraint. Pottery Barn works in muted neutrals, natural textures and chunky proportions, and all three of those are surprisingly easy to fake on a tight budget.
I tested these ideas in my own apartment, borrowed a few from friends and readers, and abandoned a couple that looked terrible (I will tell you which ones). This is a long guide because DIY home decor on a budget only works when the details are right: which paint, how many coats, what to seal it with, and how to style the finished piece so it looks expensive instead of crafty. Prices at most Dollar Tree stores are $1.25 per item, though inventory changes constantly, so treat the supply lists as a flexible guide rather than a promise.
First, Learn the Pottery Barn Formula Before You Buy Anything

The real problem with cheap decor is not the price. It is that everything looks like it came from a different store. Pottery Barn rooms feel expensive because they follow a quiet formula, and once you see it you can copy it with almost any budget.
The formula has four parts. First, a narrow color palette: warm white, cream, greige, black, a little brass or bronze and one natural wood tone. Second, texture over pattern, so a rough ceramic, a nubby linen and a woven basket do the visual work that a busy print would do elsewhere. Third, scale: a few big pieces beat a dozen tiny ones. Fourth, imperfection. Real pottery has a slightly uneven glaze, real linen wrinkles, and real wood has grain.
Every hack below is designed around those four rules. When you shop, skip anything with glitter, a loud print, a printed slogan or a color that is not on that list. You can always paint it, but you cannot un-glitter a pumpkin.
Pro tip: Before you buy, set your phone’s camera to a black and white filter and look at the shelf. Cheap items often show their true shape and finish more clearly without color, and you can tell fast which vases have a nice silhouette worth painting.
The Supply List for Dollar Tree Decor Hacks (What You Actually Need Beyond the Store)
Almost every hack in this post depends on the same handful of supplies. Buying them once and using them across projects is what keeps the total cost low, and it is also why this works as a budget living room makeover instead of twenty separate shopping trips.
| Supply | Used for | Rough cost | Where I buy it |
|---|---|---|---|
| Matte or chalk-style paint in cream, greige and black | Vases, frames, baskets, trays | $4 to $9 per small sample or craft bottle | Craft or hardware store |
| Lightweight spackle or joint compound | Textured, stoneware-look finishes | $5 to $8 per tub | Hardware store |
| Matte clear sealer spray | Protecting painted surfaces | $7 to $10 | Hardware or craft store |
| Hot glue gun and sticks | Almost everything | $6 to $12 | Anywhere |
| Jute twine or natural rope | Wrapping, handles, texture | $3 to $6 | Craft store or Dollar Tree |
| Gold or brass spray paint | Candle holders and accents | $6 to $9 | Hardware store |
| Sandpaper (fine grit) | Scuffing glossy surfaces so paint sticks | $2 to $4 | Hardware store |
If you are a renter or have a little space, one more thing is worth having: a cardboard box or old drop cloth to spray paint on. I once ruined a patch of balcony tile with a gold mist and learned that “it will wipe off” is not always true.
1. Make Faux Stoneware Vases With Spackle and a Sponge

This is the one hack I will happily go big on, because it changes the way a dollar-store vase looks in a way that paint alone cannot. Glossy glass and plastic scream cheap. A thick, slightly rough, matte surface looks like hand-thrown pottery, which is exactly what you pay a premium for at a home decor store.
Start with a plain ceramic or glass vase with a nice shape. Scuff it with sandpaper so the texture can grab. Mix lightweight spackle with a little cream or warm white paint until it looks like thick frosting. Dab it on with a sponge or a stiff brush in uneven patches, let it dry for several hours, then lightly sand any peaks that look sharp. Finish with one coat of paint in the same color and a matte sealer.
My neighbor Dana did this to six identical vases and gave them each a slightly different cream, which made the group look collected over years rather than bought in one trip. The trade-off is time. Spackle needs a full day to cure, and if you rush it, it cracks. Also keep these for dried stems or faux flowers. They are not meant to hold water.
Pro tip: Mix a tiny amount of sand or baking soda into your paint for the final coat. It gives a gritty, kiln-fired feel that a smooth coat will never get you.
2. Turn Plain Glass Cylinders Into Rope-Wrapped Hurricanes
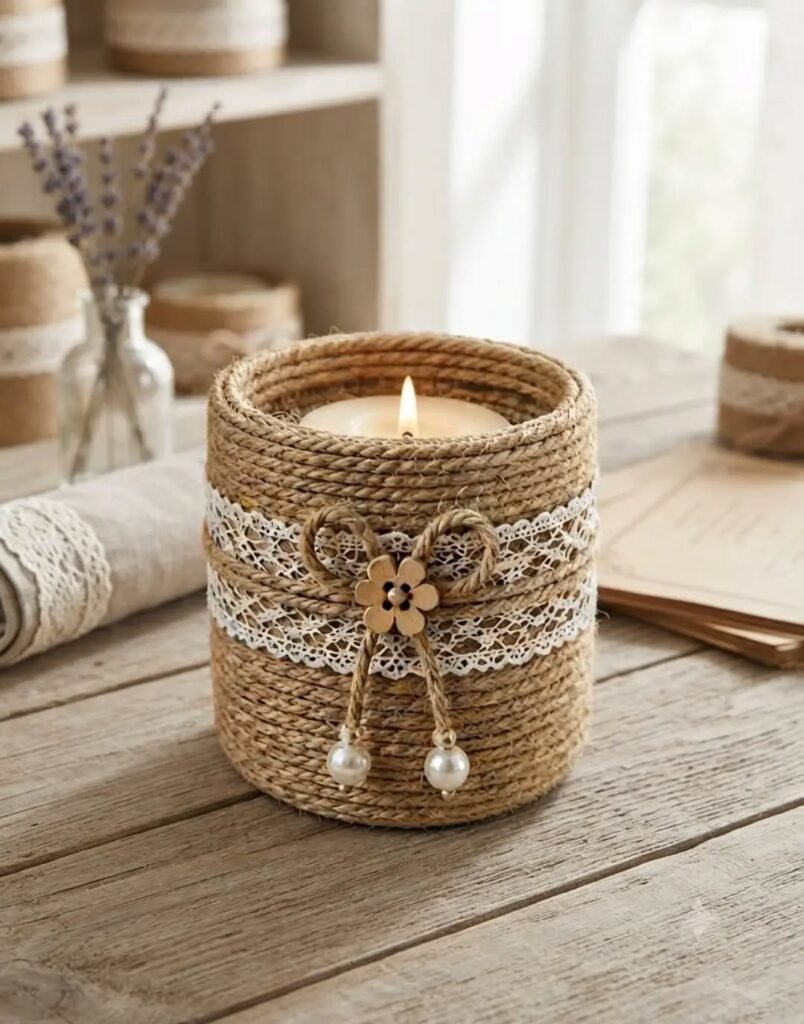
Glass cylinder vases are among the most dependable Dollar Tree finds, and a wrap of rope or jute turns them into something that belongs on a coastal-style shelf. The point of this one is warmth. Bare glass reflects light and looks cold, while rope adds the natural texture Pottery Barn leans on so heavily.
Apply a thin line of hot glue at the base, press the end of the rope into it and wind upward, adding dots of glue every few turns. Leave a few millimeters between rows if you want a looser look, or push them tight for a chunkier one. Finish by tucking the top end under the last row. A pillar candle inside, or an LED one, finishes the effect.
If you are using real candles, keep the flame well below the rope line or use a shorter candle sitting in a smaller glass inside. Rope near an open flame is not worth the risk, and I would rather use a flameless candle than have a fire story.
3. Build Fluted Vases With Wooden Dowels or Craft Sticks
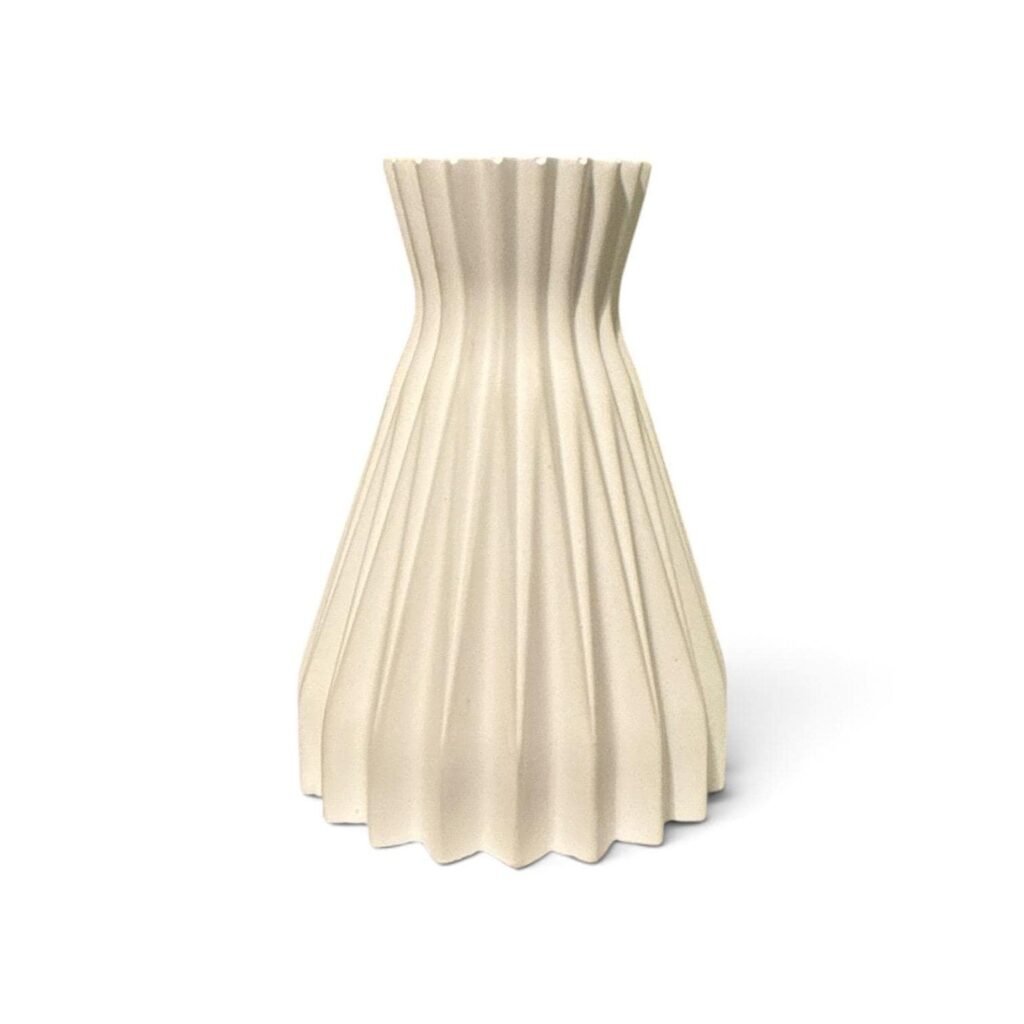
Fluted and ribbed vases are everywhere right now, and the real ones cost far more than the materials suggest. You can get the same look with a cylinder vase and a pack of thin dowels or flat craft sticks glued around the outside.
Cut the dowels to the vase height, then glue them vertically, side by side, until the vase is wrapped. Paint the whole thing in warm white or a soft oatmeal, and seal it. The reason this works is the shadows: parallel vertical lines catch light in a way that makes the piece look carved.
Be honest about the weak spot, though. The gaps between dowels will show if you do not space them evenly, and a wobbly line looks homemade in a bad way. Use a strip of masking tape as a guide for your first row and check it every few dowels.
4. Create a Marble-Look Tray With Contact Paper
A marble tray on a coffee table or bathroom counter is one of the classic Pottery Barn setups, and a real one costs real money. A plain rectangular cutting board or serving tray with a layer of marble contact paper looks surprisingly close, especially in photos and from a few feet away.
Cut the contact paper a little larger than the surface, peel and smooth it down from the center out to avoid bubbles, and trim the edges with a sharp craft knife. A tiny line of gold paint pen around the edge makes it look like a finished piece. Use it to corral candles, a soap dispenser or small plants.
The honest warning is that contact paper scratches and peels with heat. Do not put hot mugs on it, and do not use it for food. I tried a cheap version first and the corners lifted in about two weeks because I skipped cleaning the surface, so wipe it with rubbing alcohol before you stick anything down.
Pro tip: Choose a contact paper with soft gray veining, not bold black veins. Dramatic marble patterns look fake fast, and the subtle versions look much more expensive.
5. Style Greenery in Pots Like a Designer Would
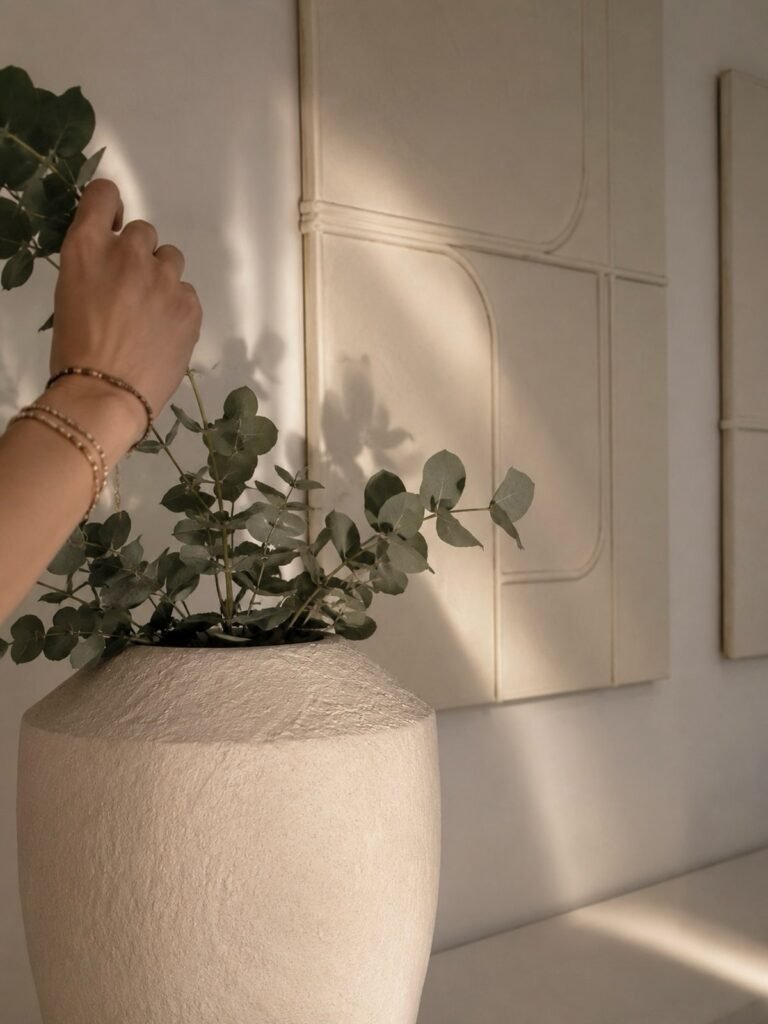
Faux plants are a quiet trap at Dollar Tree. A stem that looks fine in the aisle can look plasticky once it is home. But the cure is not to buy fewer plants, it is to buy fewer colors and style them like a real arrangement.
Pick eucalyptus, olive branches or simple leafy stems in muted greens rather than bright ones. Trim the stems to different heights, bunch them in odd numbers and push them deep into a heavy vase so the arrangement looks intentional. If a leaf looks too shiny, wipe it gently with a damp cloth and a little dish soap, or dust it with a touch of matte spray.
A reader named Marisol told me she filled a textured vase with seven eucalyptus stems and nobody noticed they were fake until they touched them. That is about the right target. Arrange them loosely, not in a tight bouquet, because real plants never grow in a perfect fan.
6. Make Pottery Barn Style Candle Holders With Gold Spray Paint
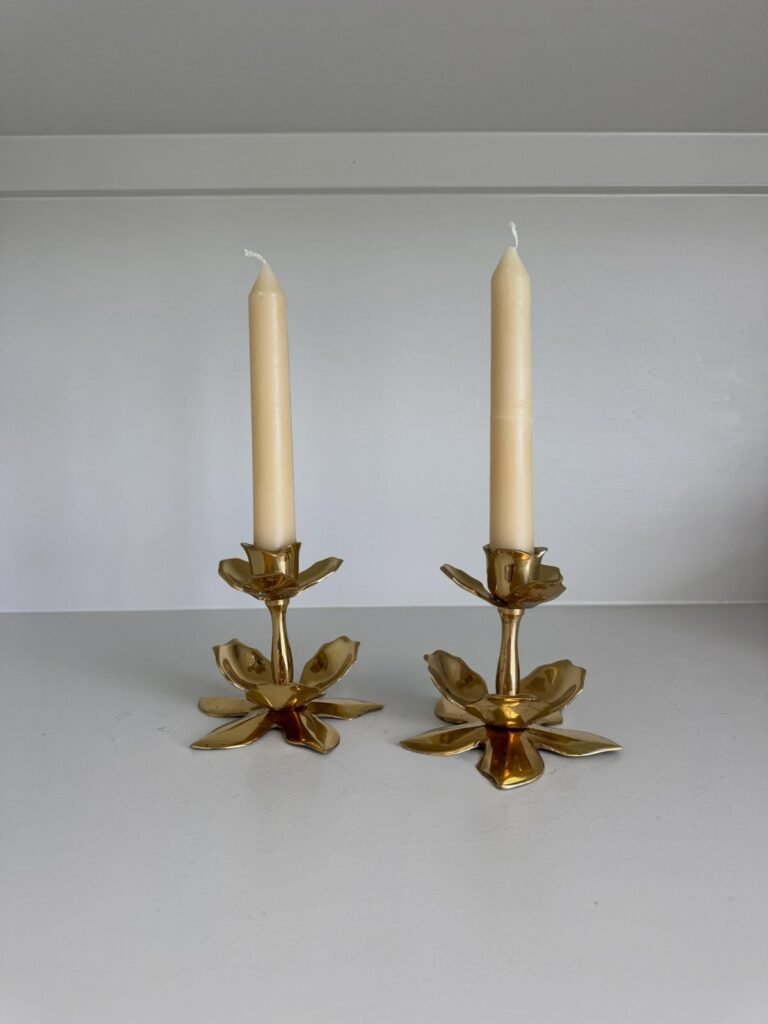
This is the cheapest way to get an aged brass look. Plain glass votives, small bowls and even plastic holders can be turned into warm metallic pieces with a light spray of gold or antique brass paint.
Work outside or in a well-ventilated space, spray in light, even coats from about eight inches away, and let each coat dry before the next. For an aged look, dab a small amount of dark brown paint with a sponge into corners and wipe it back. Real brass is never perfectly shiny, and that darker patina is what sells the illusion.
For safety, only paint the outside of glass holders and keep the flame small. If you plan to burn a real candle inside, use a tealight in a metal cup instead of pouring wax directly into painted glass, and never leave it unattended.
7. Frame a Gallery Wall With Oversized Mats
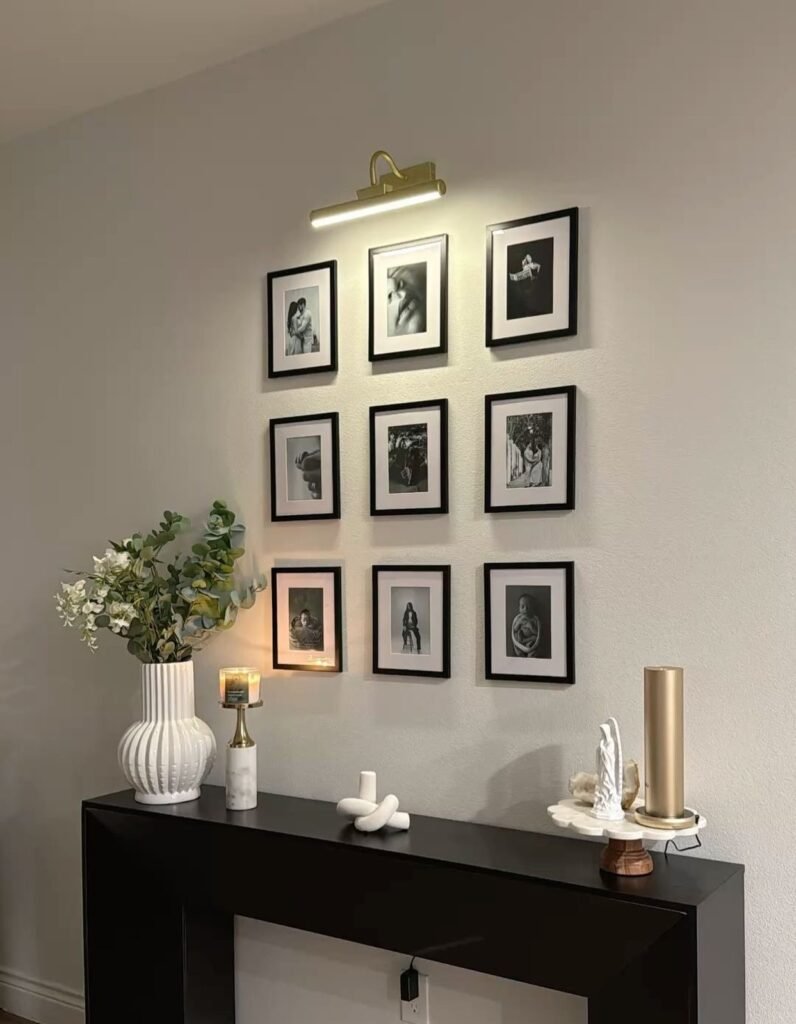
The look of an expensive gallery wall is almost entirely the mat. A big white mat around a small piece of art makes it look intentional, professional and calm. Dollar Tree frames are often glossy black or gold plastic, which looks cheap, but the fix is easy.
Spray or paint the frames matte black or warm wood tone, then print simple black and white photos, botanical sketches or neutral abstract art at home. Use a cut piece of white cardstock as a mat, leaving a wide border. Hang them in a grid with equal spacing, because a gallery wall with uneven gaps is the fastest way to look amateur.
Renters, you can hang the whole set with adhesive strips, or lean the frames on a shelf. I like the leaning method for apartments, since it keeps your deposit safe and lets you swap art when you get bored.
Pro tip: Print your art slightly larger than the frame opening and trim it. A tiny white edge showing at the border is the most common giveaway that a print was resized badly.
8. Turn Wooden Cutting Boards Into Console Table Risers
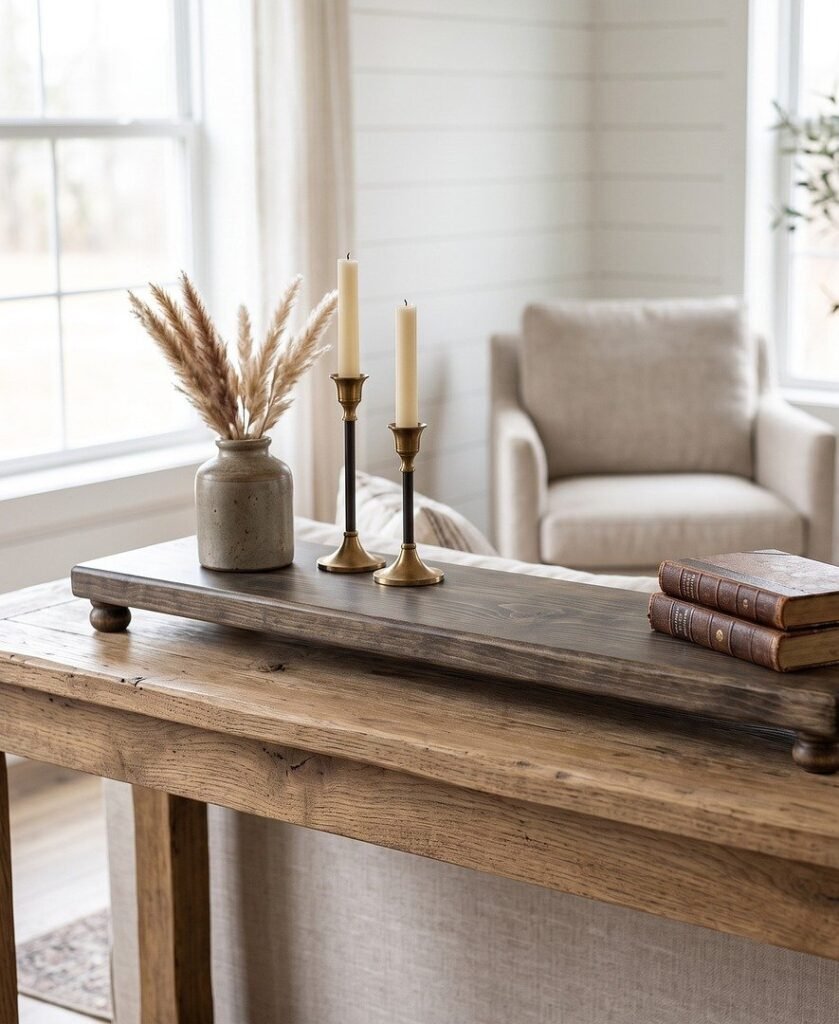
Height is something budget decor rarely gets right, and risers fix that. A small wooden cutting board propped on two blocks or a pair of stacked wooden boxes gives a candle or a vase a pedestal, which is how stores style almost every shelf.
Glue two or three small wooden blocks under a board, sand the edges for a softer look and finish it with a wood stain or a warm paint wash. Group items of different heights on top, with the tallest at the back and a low bowl at the front. That layering is the thing that separates a styled surface from a pile.
The trade-off is stability. Make sure the legs are even and glued firmly, and do not place anything heavy on it. A leaning stack of ceramics is not a design choice, it is a broken vase.
9. Make a Linen-Look Pillow Cover With Dollar Tree Tea Towels
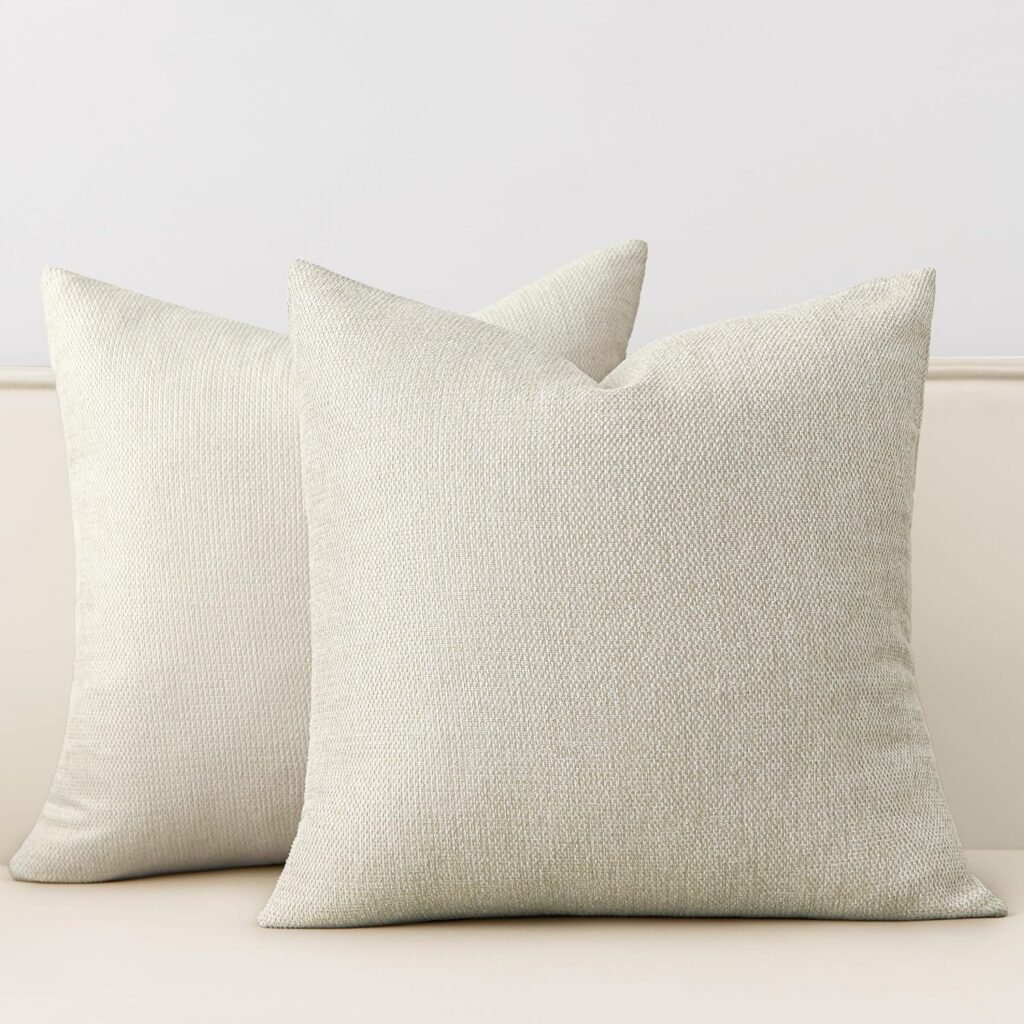
Throw pillows are among the most expensive things to buy at a home decor store, and this hack is the one I recommend to everyone who hates sewing. A large linen-style tea towel or cloth napkin can be turned into a pillow cover with a few seams, or no seams at all.
Fold the towel around a pillow insert, mark where the edges meet and either sew along the sides or use fabric glue. If you do not sew, use fabric tape or a few safety pins hidden on the inside of the overlap. Choose natural colors like oatmeal, ivory or soft gray, and iron the fabric first.
The honest limit here is durability. These covers are not meant for a sofa used daily by kids or pets. They are better on a guest bed or an accent chair, and washing them gently by hand keeps the fabric from stretching.
10. Build a Dough Bowl Centerpiece From a Wooden Bowl

A long, shallow wooden dough bowl is one of the most photographed pieces in farmhouse decor, and the real ones can cost a lot. A plain wooden salad bowl or oval serving tray, stained and styled well, gets very close.
Sand the surface lightly, apply a warm walnut or driftwood stain and wipe off the excess for a soft, uneven finish. Fill it with pinecones, faux lemons, wooden beads or a few mini pumpkins depending on the season. The bowl does the work, so keep the filler simple.
This looks best on a dining table or an entryway console. I would not use a stained bowl for actual food, since stain and finish can leach, so treat it purely as decor.
11. Frame a Mirror With Rope for an Instant Coastal Look
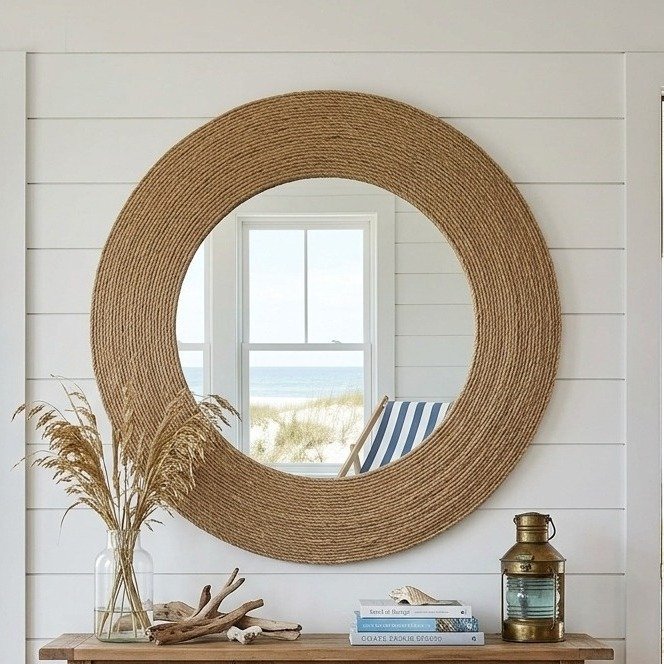
A round rope-framed mirror is a staple of the Pottery Barn coastal aesthetic, and a plain round mirror from Dollar Tree is a surprisingly good starting point. The rope hides the plastic edge and adds exactly the texture a smooth mirror is missing.
Start at the back of the frame, glue the end of the rope down and wind it tightly around the border, adding glue every few turns. Use a thicker rope for a bolder look. Hide the end by tucking it behind the last wrap. A single mirror hung low over a console or leaned on a mantel makes a small room feel bigger.
Check the weight of the mirror before you hang it. These mirrors are light, but rope adds ounces, and an adhesive hook rated too low will not hold it. If you are not sure, lean it instead.
12. Line Baskets With Fabric So They Look Custom
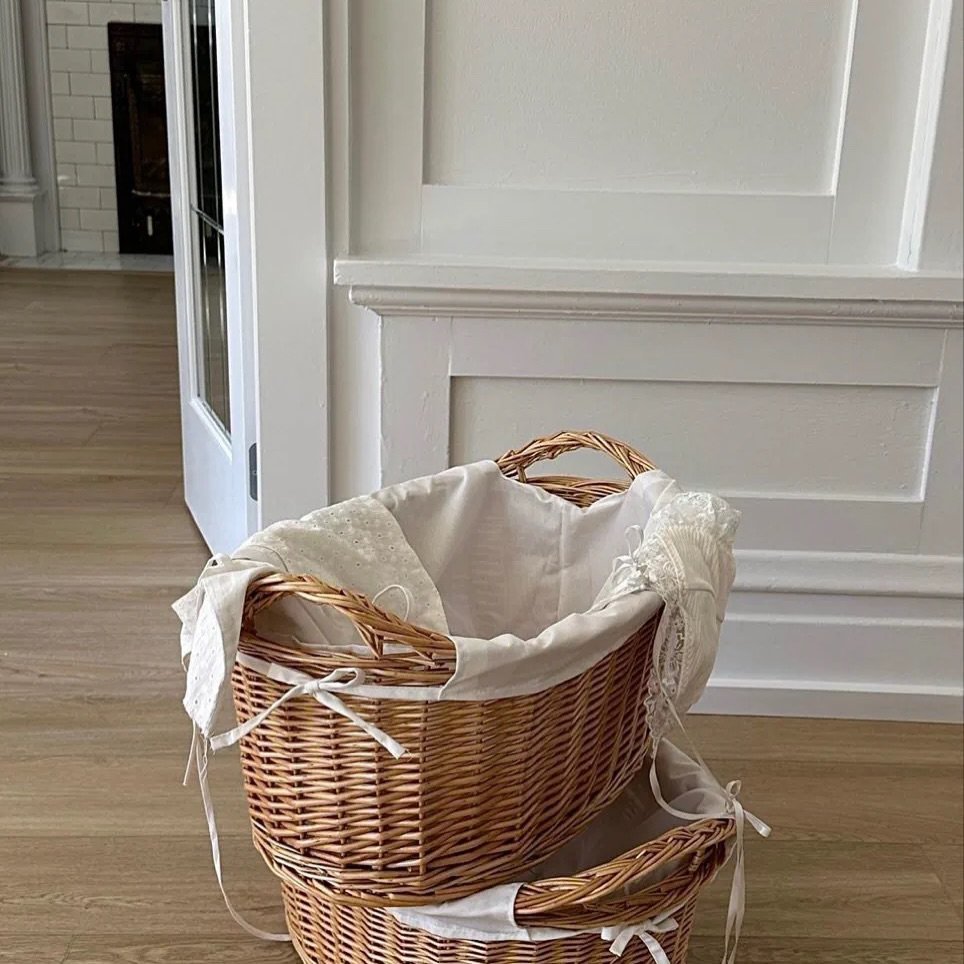
Baskets are great at hiding clutter, and a fabric liner is what makes them look designed instead of grabbed. A plain woven basket with a neat lining and a rope handle looks like something from a catalog.
Cut a rectangle of fabric large enough to line the inside and fold over the edge, then glue or tuck it in. Use a natural fabric such as a linen-look napkin so it matches the weave. If the basket is for blankets, throw in a pretty throw folded loosely on top so the whole thing becomes a display instead of storage.
The common mistake is using a liner with a loud print, which fights the basket. Stick with solids, and if you want pattern, make it a subtle stripe.
13. Make Apothecary Jars From Mason Jars and Candlesticks
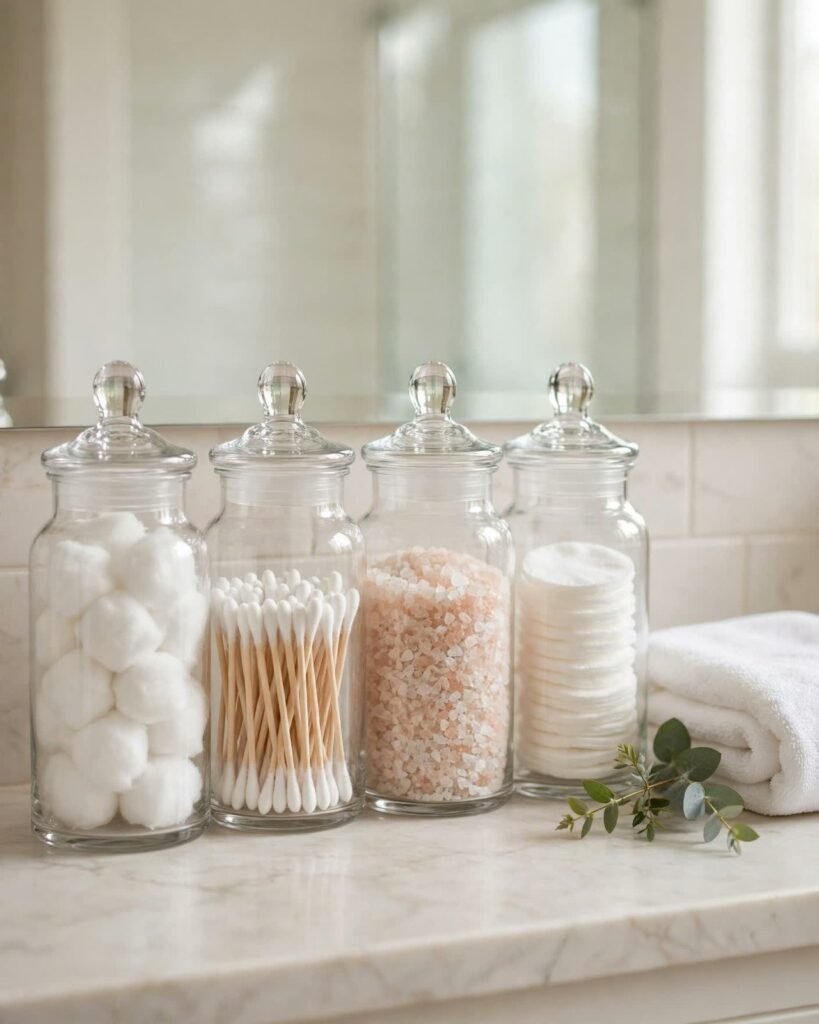
Glass apothecary jars with a pedestal base are a bathroom and kitchen classic. You can make your own by gluing a small candlestick or a glass bowl to the underside of a jar or a lidded glass container. Wait for the glue to cure fully before you use it.
Paint the base in matte black or gold, and fill the jar with cotton balls, bath salts, or neutral shells. The lid should be tight, so test it before you pour in anything you care about. Place two or three jars of different sizes on a tray for a spa look.
These are strictly decorative, though. Hot glue and spray paint are not food safe, so keep them out of the pantry.
14. Use Glass Cloches to Display Small Objects

A glass cloche, the domed lid that seems to turn any object into a museum piece, can be built from a glass bowl turned upside down on a plate or a wooden base. Dollar Tree’s glass bowls and plates are good for this, and the effect on a coffee table is surprisingly elegant.
Choose a bowl with a smooth rim, flip it over a small wooden disc or a plate, and place a stack of books, a small plant, or a candle underneath. It elevates simple objects and adds a layer to a tray styling.
Clean the glass well with vinegar and water, because fingerprints are very visible here. Also avoid using anything flammable or heat-producing under the bowl.
15. Build a Neutral Wreath With Faux Eucalyptus

A full, loose eucalyptus wreath looks like something you would pay a boutique price for, and the supplies cost almost nothing. A basic wire or foam wreath form, a few bunches of faux greenery and some floral wire are enough.
Attach the stems at an angle in one direction so the wreath looks like it is flowing rather than stuck on. Layer shorter stems in front, tuck in a few sprigs of dried baby’s breath or white berries, and add a simple ribbon in cream or natural linen. Do not overload it. A wreath with space in it looks more natural than a full ring.
If you hang it on a door, use a removable hook and check the weight. Also watch for sun, since cheap faux leaves can fade within a season if they are exposed to direct afternoon light.
16. Create Soap Dispensers From Glass Jars for the Bathroom
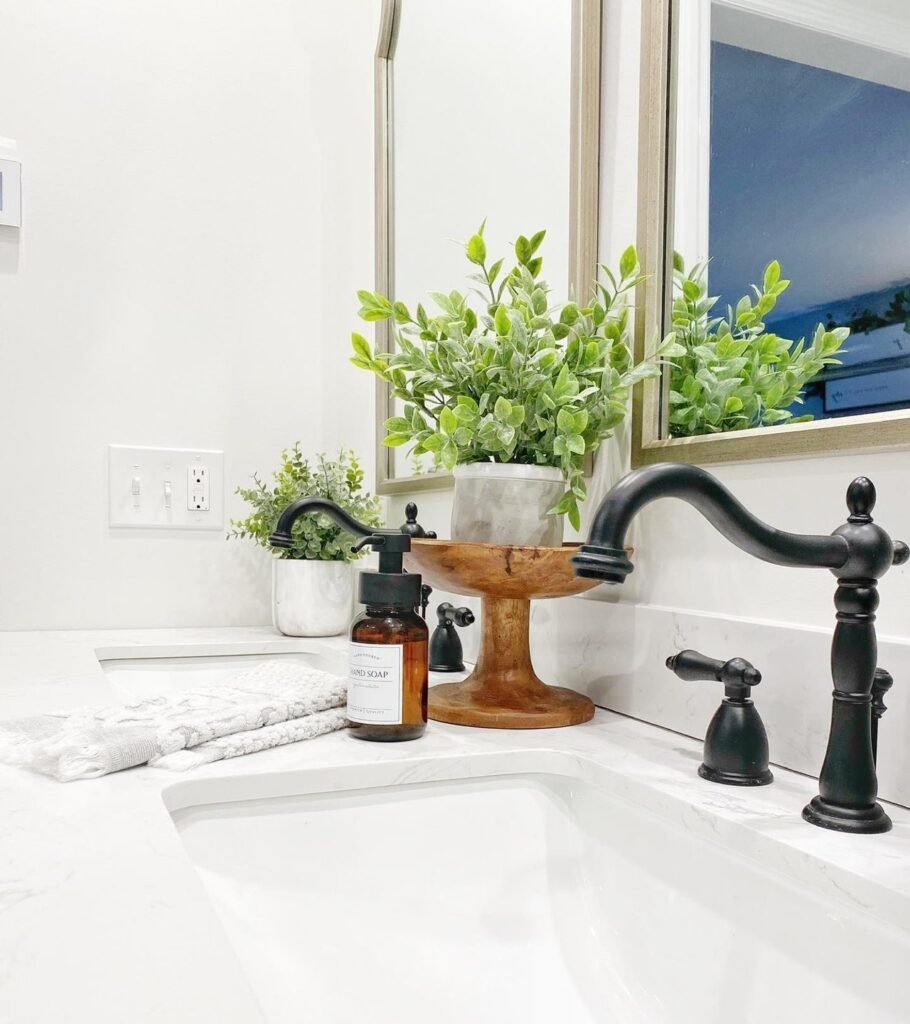
Branded plastic soap bottles are the fastest way to make a bathroom look unstyled, and a simple glass jar with a pump top fixes that. You can buy a pump lid separately and fit it to a clean glass bottle or jar, or look for ready-made dispensers in the cleaning aisle.
Paint or wrap the outside of a bottle with matte paint or twine for a spa feel, and add a simple handwritten label with a paint pen. Group it with a small tray and a hand towel rolled neatly beside it.
A realistic warning from my own bathroom: painted bottles near a sink get splashed constantly, so seal them well and expect to touch up the paint every few months. If you want it low maintenance, use a plain frosted or clear glass dispenser and skip the paint.
17. Add a Faux Ceramic Bowl for Catchall Styling
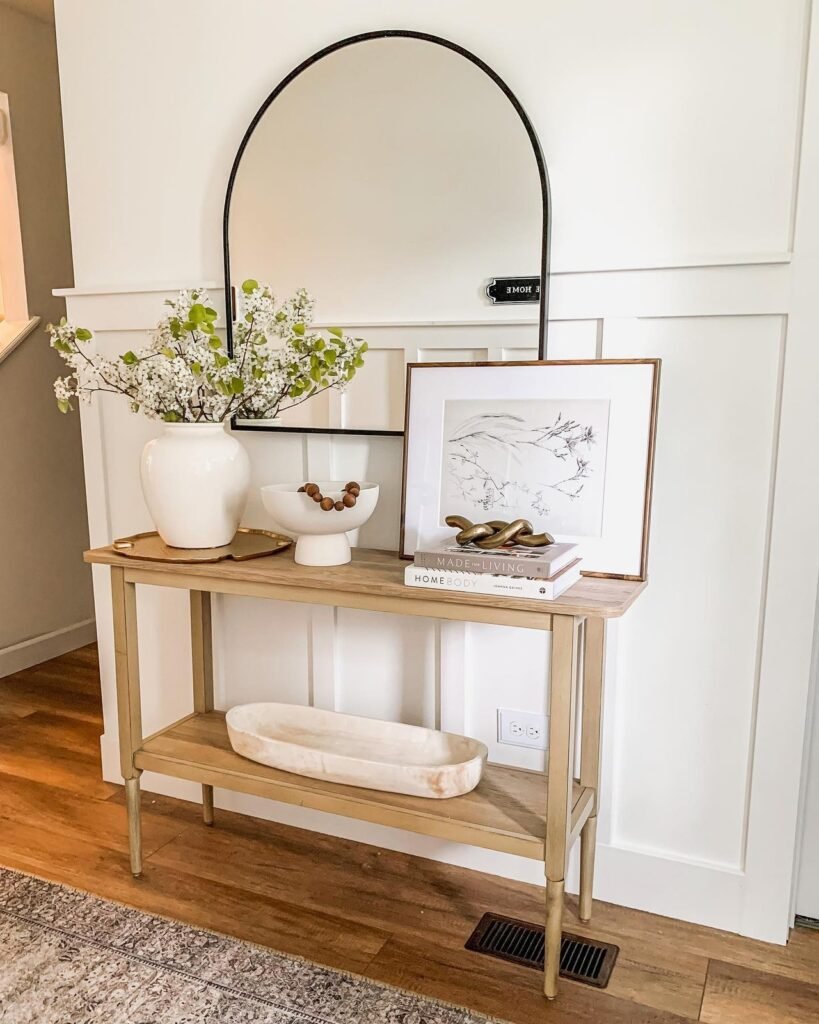
A shallow bowl for keys and jewelry is one of those pieces that every Pottery Barn console has, and the dollar-store version needs a bit of paint to match. Take a plain bowl, scuff it, paint it in a warm white or soft taupe and seal it.
For a pottery feel, add a drip of a darker shade around the rim or paint the inside a contrasting color. Even a simple two-tone bowl looks handmade. Place it where it actually earns its place, like the entryway, so it is useful as well as pretty.
Just do not expect painted decor to survive a dishwasher. These are for dry objects, and a quick wipe with a damp cloth is as rough as they should get.
18. Make a Cozy Table Runner From a Drop Cloth or Burlap Strip
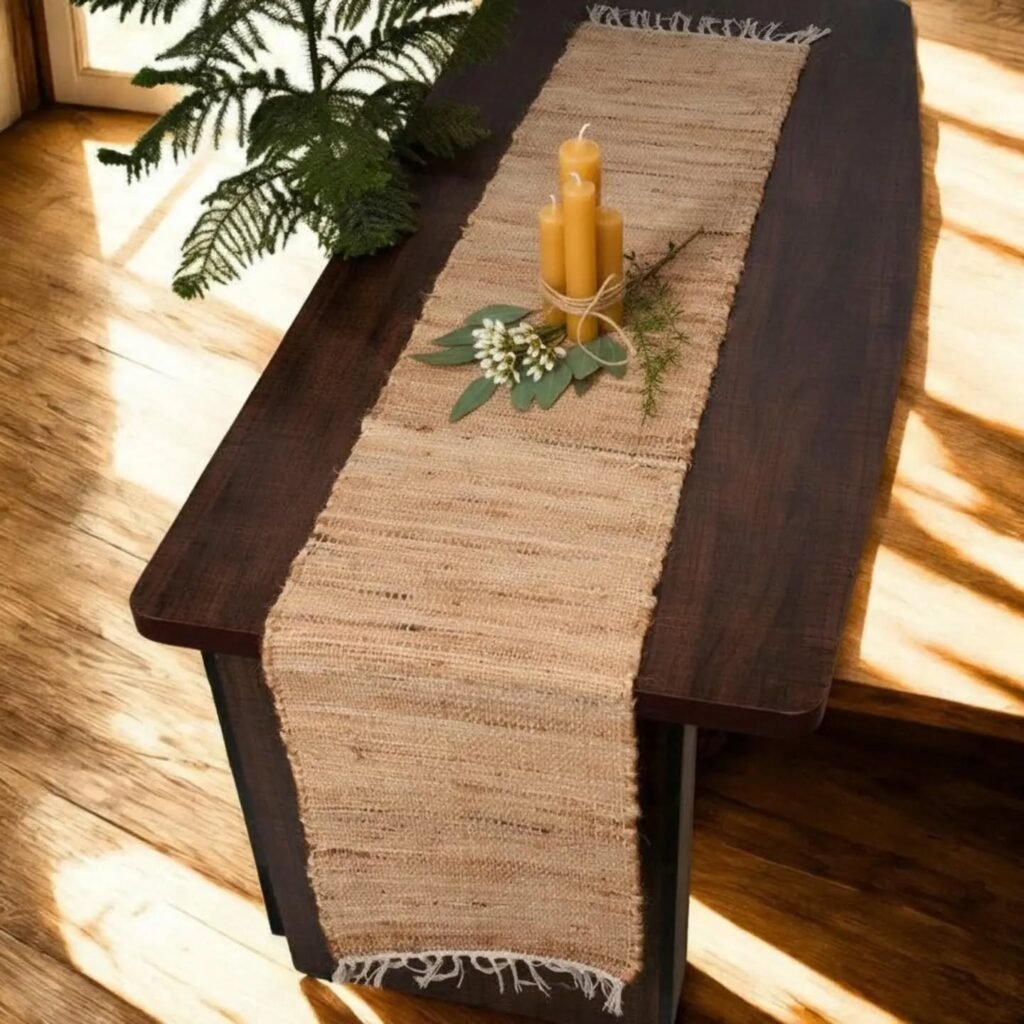
A natural textile runner is one of the quickest ways to bring warmth to a dining table or a console. A strip of drop cloth, a long linen napkin, or a fabric remnant works, and the frayed edge is part of the look.
Cut a strip to the length of the table, leaving about six inches of overhang on each end, and pull a few threads from the sides for a frayed edge. Wash and iron it first, because new fabric often shrinks and wrinkles. Layer it with candles, a wooden bowl and a few stems of greenery in the center.
The runner is the base layer that makes everything else look styled. If your table is dark wood, choose a lighter fabric. If it is pale, a darker oatmeal or greige reads as more intentional.
19. Build a Simple Lantern From a Cheap Candle Holder
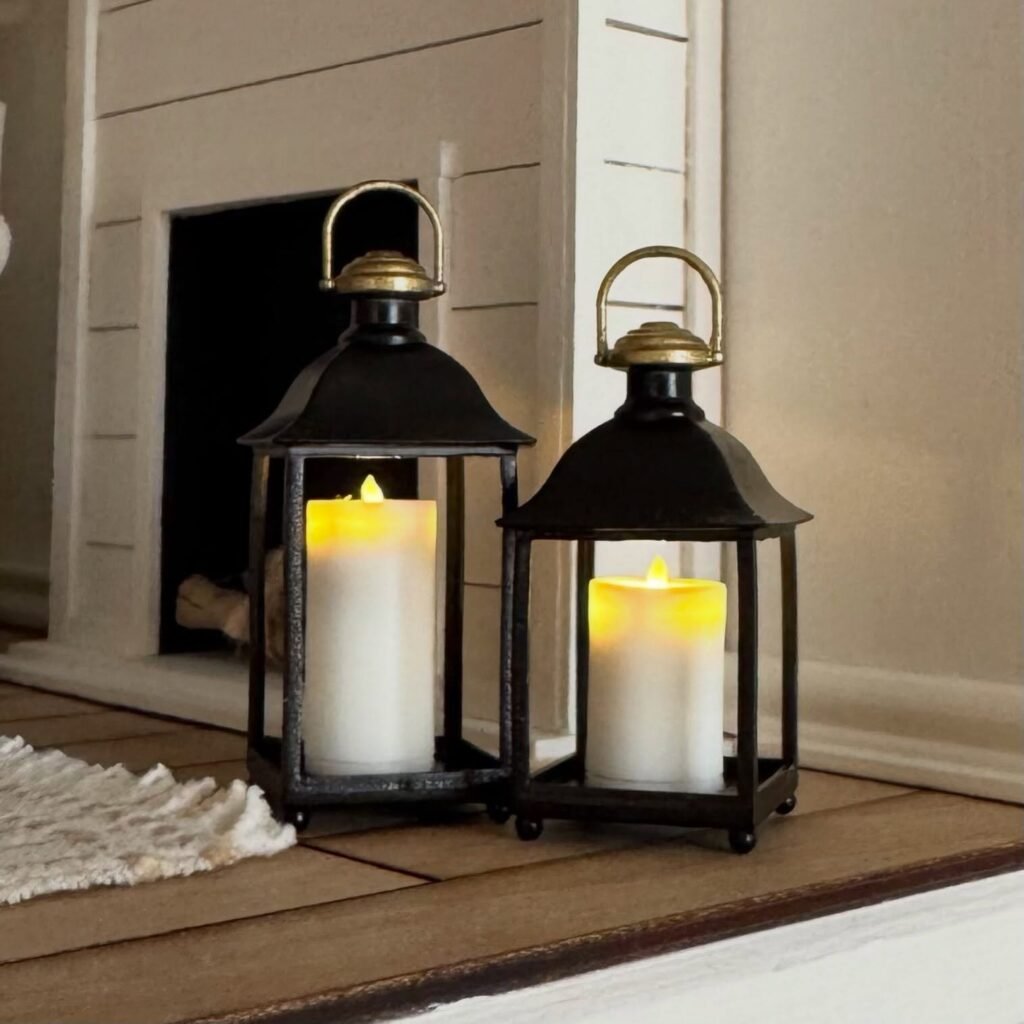
Black metal lanterns are a Pottery Barn staple for porches and mantels. You can approximate one with a glass candle holder, a few craft sticks and some matte black paint, or by painting an existing metal holder.
Spray the frame in matte black, let it cure, and add an LED candle inside. Group two or three at different heights on a mantel, a hearth or a patio table. The black frame against a neutral wall adds contrast, which is exactly what a beige room often needs.
Skip real candles inside plastic frames, and be careful with anything flammable near the flame. LEDs are cheaper over the long run and safer in an apartment.
20. Pull It All Together With a Styled Tray and a Single Statement

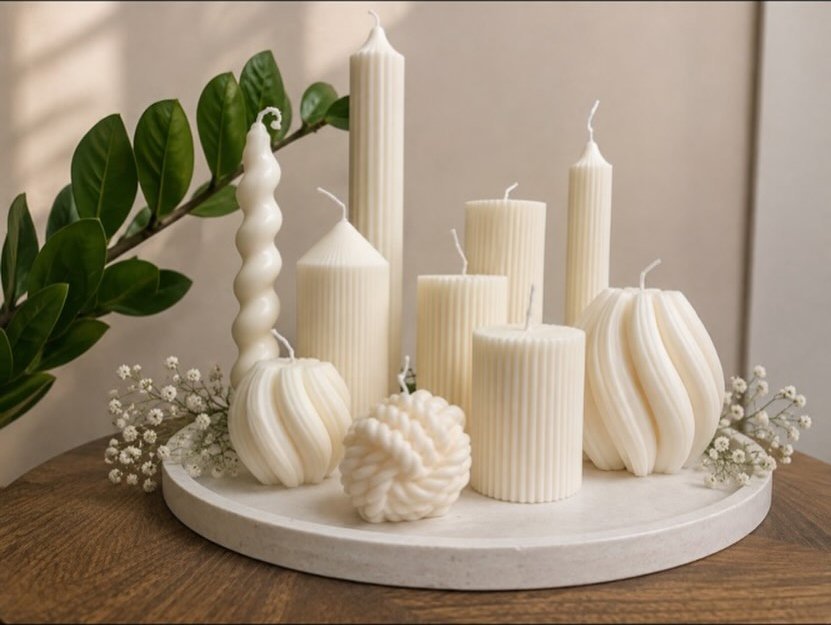
This last one is not a craft, it is the step that makes every other hack look expensive. Put a tray on your coffee table or console and style it with three things: something tall, something low and something natural. A rope-wrapped candle, a textured vase and a small bowl is enough.
Pottery Barn styling works because the eye has a place to rest. Leave a little empty space, keep your palette tight and repeat one material, like wood or rope, twice in the grouping. If something does not fit the palette, take it out.
The biggest mistake I see is crowding. A coffee table with eight small objects reads as clutter, while a tray with three well-chosen ones reads as design.
Pro tip: Take a photo of your styled surface before you call it done. Cameras flatten a scene, and you will instantly see if one object is too tall, too bright, or fighting for attention.
Dollar Tree Decor Hacks Compared: Cost, Time and Difficulty
If you want to start with the projects that give the best return for the least effort, this table shows how I would rank them. Costs include the Dollar Tree item and the extra supplies, but they assume you already own basics like glue and paint.
| Hack | Approx. cost | Time | Difficulty | Looks expensive? |
|---|---|---|---|---|
| Rope-wrapped hurricane (#2) | $3 to $5 | 30 minutes | Easy | Yes |
| Gold spray candle holders (#6) | $2 to $4 each | 1 hour plus drying | Easy | Yes |
| Eucalyptus greenery styling (#5) | $5 to $10 | 20 minutes | Easy | Yes, if you limit the colors |
| Marble-look tray (#4) | $4 to $8 | 30 minutes | Easy | Yes from a distance |
| Rope mirror (#11) | $3 to $6 | 1 hour | Medium | Very |
| Stoneware spackle vase (#1) | $4 to $7 | 2 hours over 2 days | Medium | Very |
| Fluted dowel vase (#3) | $6 to $10 | 1 to 2 hours | Medium | Very |
| Linen-look pillow cover (#9) | $3 to $6 | 30 to 60 minutes | Medium | Yes, in soft neutrals |
| Eucalyptus wreath (#15) | $6 to $12 | 1 hour | Medium | Yes |
How Much Does a Whole Dollar Tree Pottery Barn Look Cost?
Most people want to know the honest total, because “cheap” can quietly turn into a fifty dollar craft haul. Here is how I would spend money at three levels if you were starting from nothing.
| Budget | What I would make | What you get |
|---|---|---|
| Under $25 | Two rope hurricanes, one greenery arrangement, one styled tray | A coffee table or console that looks styled |
| $25 to $60 | Add two textured vases, a rope mirror and gold candle holders | A fully styled living room corner |
| $60 to $100 | Add a gallery wall, fluted vases, pillow covers and a wreath | A cohesive room makeover with a unified palette |
If you are only going to buy one set of supplies beyond the store, make it a good matte paint and a sealer. Those two things make the biggest difference between “looks homemade” and “looks bought,” and they carry over to every project.
Common Mistakes That Make Dollar Tree Decor Look Cheap
I made most of these, so this is not a lecture. It is a list of the things that quietly ruin an otherwise good project, and none of them cost money to fix.
The first is skipping the prep. Glossy glass and plastic need to be scuffed and cleaned before paint will stick, and skipping that step is why paint peels in a month. The second is using too many colors. A shelf with cream, black, brass and one wood tone looks designed, while the same shelf with five colors looks like a yard sale. The third is leaving price stickers or glue strings visible, which sounds obvious until you are staring at one in a photo.
Another common problem is scale. Tiny objects scattered across a big surface look lost, while grouping a few chunky pieces looks intentional. And finally, do not skip the sealer. Unsealed paint scratches, and a scratched piece reads as cheap even if the design was perfect.
If I Were Starting Over, Here Is What I Would Do First
I would skip the fancy projects and begin with the rope hurricane and one spackle vase. They are the two hacks that taught me the most about texture, and they are forgiving if you mess up. Then I would pick a palette of three colors and stay inside it, because every project afterward gets easier when the choices are already made.
After that, I would style one surface properly, with a tray, a tall piece, a low piece and something natural, before I touched another craft. That is the point where Dollar Tree decor hacks start to look like Pottery Barn, not because of any single project but because the room finally has a plan. Start small, let paint dry fully, and resist the urge to add one more thing.
Frequently Asked Questions About Dollar Tree Decor Hacks
Do Dollar Tree decor hacks actually look like Pottery Barn?
They can, but only if you control the color palette, add texture and keep the styling simple. Individual items will not match the quality of real pottery up close. From a few feet away and in photos, a well-made textured vase or rope mirror holds up very well.
What paint works best on glossy Dollar Tree glass and plastic?
Matte or chalk-style paint works well once the surface has been lightly sanded and cleaned. For the smoothest result, use a spray primer first, then paint, then finish with a matte sealer. Always test on the bottom of a piece first.
Is the spackle texture hack safe for vases that hold water?
No. Painted and spackled vases are decorative and should be used with dried stems or faux flowers. If you want to hold fresh flowers, put a plastic or glass liner inside.
How much do most Dollar Tree items cost now?
At most locations, the standard price is $1.25 per item, though some products are priced higher and inventory varies by store and season. If you are planning a project, check your local store before you build your supply list around a specific item.
Can I do these projects as a renter?
Yes. Most of these projects sit on surfaces rather than hang on walls. For wall items like mirrors and frames, use removable adhesive hooks or lean them on a shelf, and check your lease first.
How do I keep painted decor from chipping?
Prep the surface, use thin coats and finish with a matte clear sealer. Handle painted pieces gently and wipe them with a dry or barely damp cloth rather than scrubbing.
What colors look the most expensive for budget decor?
Warm white, cream, greige, matte black, aged brass and natural wood tones read as upscale almost every time. Bright colors, shiny finishes and busy patterns tend to make inexpensive items look cheaper.
What is the best first Dollar Tree project for a beginner?
The rope-wrapped glass cylinder. It takes about thirty minutes, needs only glue and rope, and gives you a quick win that shows how much texture changes the look of a cheap item.